

An XML sitemap plays a crucial role in helping search engines understand the structure of your website and index its pages effectively. If you’re using WordPress, the RankMath plugin makes creating and optimizing XML sitemaps simple and efficient. In this guide, Techie SEO will walk you through how to create and optimize XML sitemaps using the RankMath plugin step by step.
What is an XML Sitemap?
An XML sitemap is a file that lists all the important pages on your website. It acts as a roadmap for search engines like Google, guiding them to find and index your content faster. Having a well-optimized sitemap can improve your site’s SEO and visibility on search engine results pages.
Step 1: Install and Activate the RankMath Plugin
To begin, you need to install the RankMath plugin on your WordPress site:
- Go to your WordPress dashboard.
- Navigate to Plugins > Add New.
- Search for RankMath and click Install Now.
- Once installed, click Activate.

RankMath offers powerful SEO features, including easy XML sitemap creation.
Doing SEO in WordPress and confuse how to create XML sitemap. Click on link and follow steps.
Step 2: Enable XML Sitemap in RankMath
After activating RankMath, follow these steps to create an XML sitemap:

That’s it! You’ve now successfully created your XML sitemap through the RankMath WordPress plugin.
Step 3: Customize Your XML Sitemap Settings
RankMath allows you to customize your sitemap to ensure it meets your website’s needs:
- Include or Exclude Pages: Choose which pages, posts, or categories to include in the sitemap.
- Set Post Limits: Limit the number of links per sitemap file.
- Exclude No-Index Pages: Ensure pages marked as no-index are excluded.

To access these options, navigate to RankMath > Sitemap Settings and make adjustments based on your preferences.
Step to Step guide to create XML sitemap on Wix Website. Click on link.
Step 4: Submit Your XML Sitemap to Google
To help search engines index your site efficiently, submit your sitemap to Google:
- Go to Google Search Console (https://search.google.com/search-console).
- Select your website property.
- Navigate to Sitemaps in the left menu.
- Enter the sitemap URL (typically /sitemap_index.xml) and click Submit.
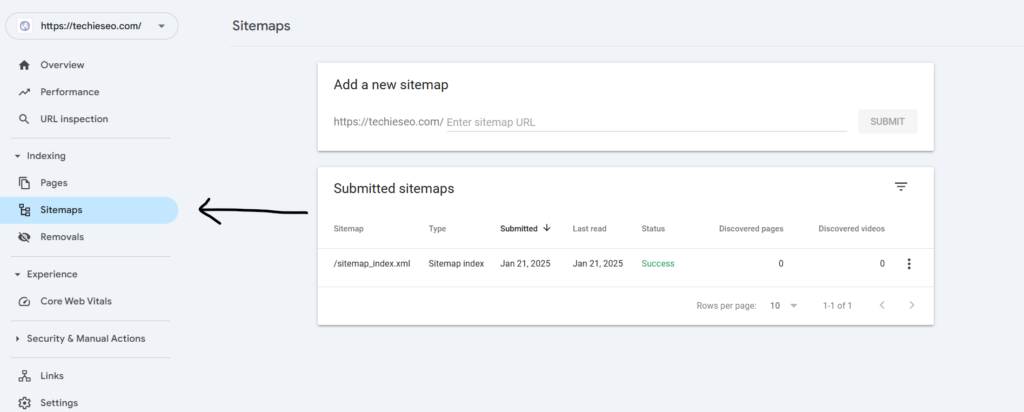
Techie SEO recommends checking back in Search Console periodically to monitor indexing status and resolve any issues.
Step 5: Optimize Your XML Sitemap for Better SEO
Here are some tips to optimize your XML sitemap:
- Keep It Clean: Include only important pages that you want search engines to index.
- Update Regularly: Ensure your sitemap updates automatically when new content is added.
- Avoid Broken Links: Regularly audit your site to fix any broken links.
- Use Categories Wisely: Structure your content categories logically to help search engines understand your site hierarchy.
Step 6: Monitor Sitemap Performance
RankMath provides insights into your sitemap performance. To check it:
- Go to RankMath > Analytics in your WordPress dashboard.
- Analyze which pages are being indexed and identify any potential issues.

Monitoring your sitemap performance is essential to maintain a healthy SEO strategy.
Conclusion
Creating and optimizing XML sitemaps through the RankMath WordPress plugin is a straightforward process that can significantly benefit your website’s SEO. By following these steps, you’ll ensure that search engines can efficiently crawl and index your content. For more SEO tips and expert guidance, visit Techie SEO and let us help you enhance your digital presence.
Start using the RankMath plugin for XML sitemap creation today and watch your website’s visibility grow!
Recommended: How to Create XML Sitemap for Your HTML Website
