

If you want your WordPress website to be easily discovered by search engines like Google, you need to create an XML Sitemap. A sitemap is like a map that helps search engines find and understand all the pages on your website.
Don’t worry! Creating a sitemap in WordPress is super easy. In this guide, we’ll show you how to do it step-by-step.
What is an XML Sitemap and Why Do You Need It?
An XML Sitemap is a file that lists all the pages, posts, and other important content on your website. It helps search engines crawl your site more efficiently, ensuring they don’t miss any important pages.
Without a sitemap, search engines might overlook some pages on your website, which can hurt your rankings. But with a proper sitemap, you’re making it easier for Google and other search engines to understand what’s on your site.
Step-by-Step Guide to Creating an XML Sitemap in WordPress
Let’s dive into the steps! We’ll use a popular SEO plugin called Yoast SEO to create the sitemap because it’s easy and free.
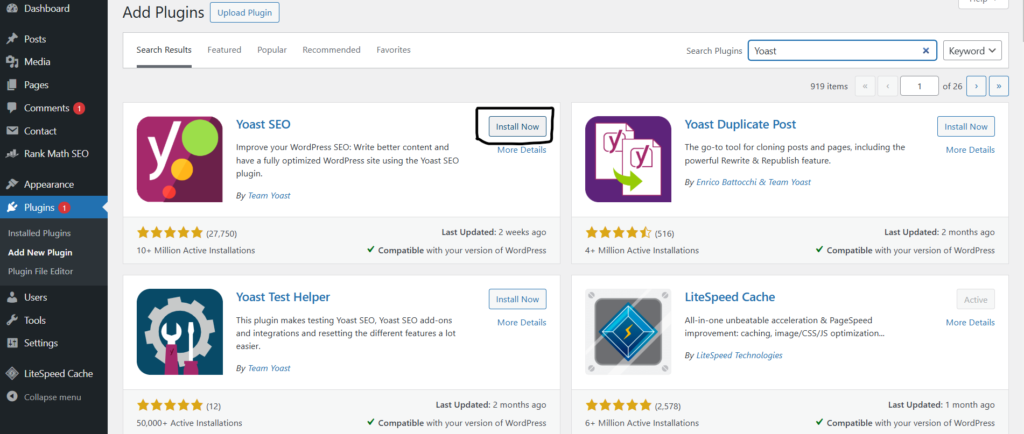
Step 1: Install the Yoast SEO Plugin
Before we create the sitemap, we need to install the Yoast SEO plugin (if you haven’t already).
- Log in to your WordPress Dashboard.
- In the left-hand menu, go to Plugins > Add New.
- In the search bar, type in Yoast SEO.
- Click the Install Now button next to the Yoast SEO plugin.
- After it installs, click Activate to turn on the plugin.
Step 2: Go to Yoast SEO Settings
- Once Yoast SEO is activated, you will see a new menu item called SEO on the left-hand sidebar of your dashboard.
- Click on SEO, then go to Settings.
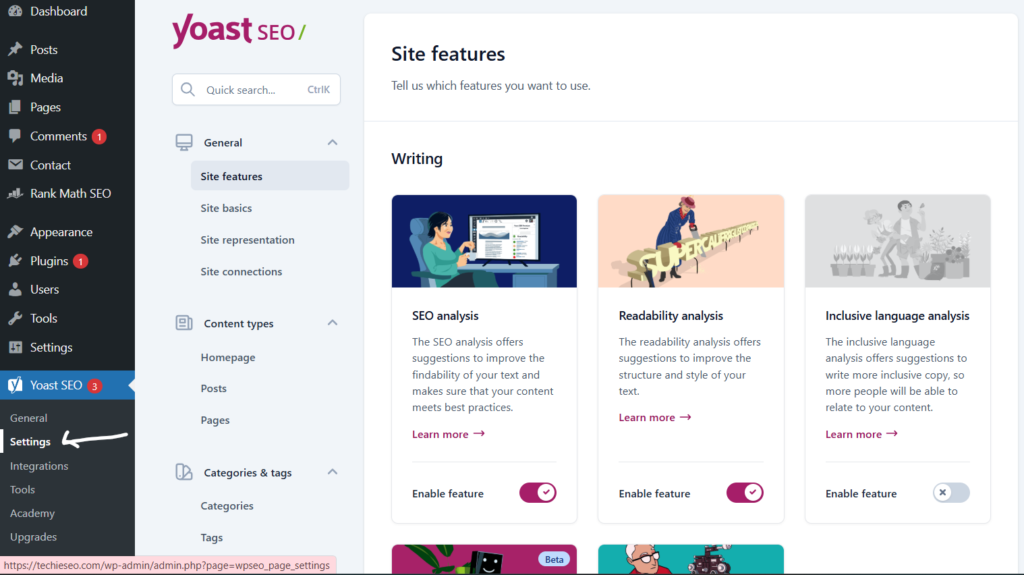
Step 3: Enable XML Sitemaps in Yoast SEO
- In the Settings section of Yoast SEO, go to the Site Features tab.
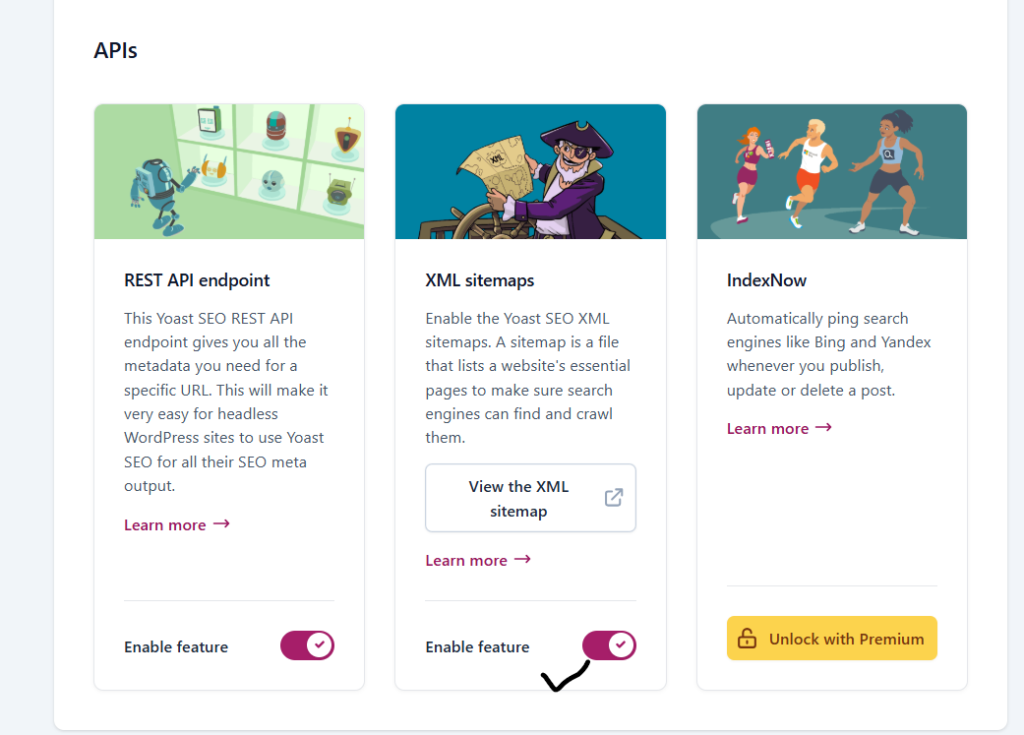
- Scroll down until you find the XML Sitemaps option.
- Make sure the switch next to XML Sitemaps is turned on. (It should be green).
- Click the Save Changes button at the bottom.
Yoast will now automatically create and manage your sitemap for you!
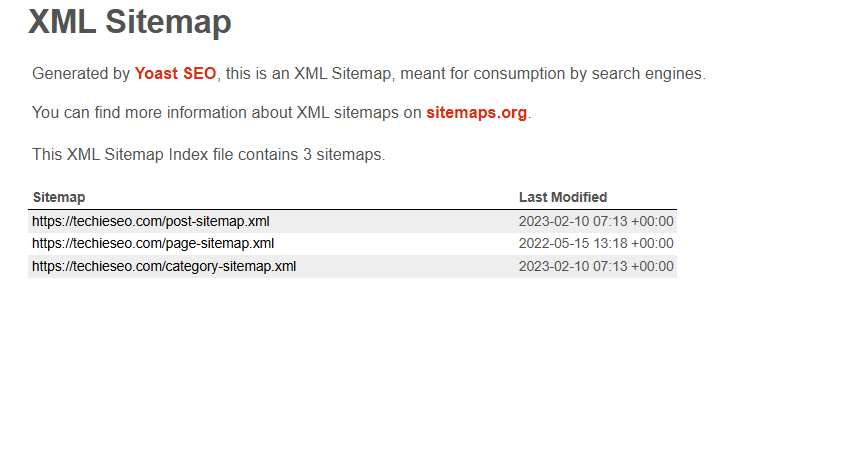
Step 4: Find Your XML Sitemap URL
Once the XML Sitemap is enabled, you’ll want to find the actual URL of your sitemap so you can share it with search engines like Google.
- After activate your XML sitemap from Yoast, You will get an button to “View the XML sitemap“
- Click the View the XML sitemap link. This will open your sitemap in a new tab.
The URL will look something like this:
https://yourwebsite.com/sitemap_index.xml
Make sure you copy this URL, as you’ll need it later to submit to search engines.
Step 5: Submit Your Sitemap to Google Search Console
Now that you have your sitemap URL, you can submit it to Google so it can start crawling your site. Here’s how:
- Go to Google Search Console.
- If you haven’t already added your website to Google Search Console, follow the instructions to do that.
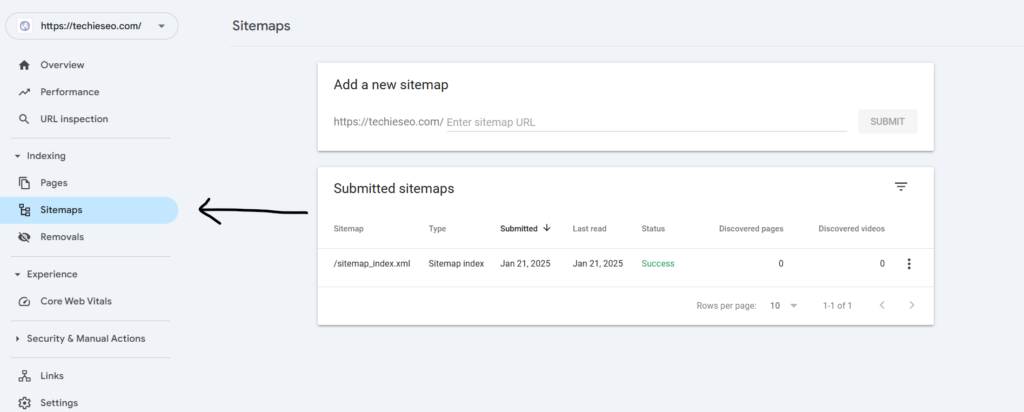
- Once your website is added, click on your site name, and then go to the Sitemaps section in the left-hand menu.
- In the Add a New Sitemap section, paste the sitemap URL you copied earlier (e.g., https://yourwebsite.com/sitemap_index.xml).
- Click Submit.
Google will now use your sitemap to find and index all the important pages on your website.
Step 6: Submit Your Sitemap to Bing (Optional)
You can also submit your sitemap to Bing to help them crawl your site.
- Go to Bing Webmaster Tools.
- Add and verify your website if you haven’t done so already.
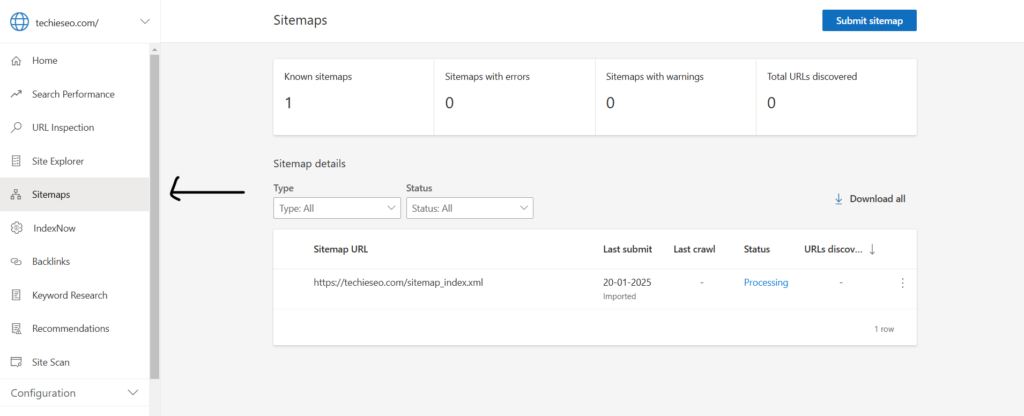
- Once your site is verified, go to the Sitemaps section.
- Paste the URL of your sitemap and click Submit.
Now Bing will also know about all your important pages.
Step 7: Keep Your Sitemap Updated Automatically
One of the best things about using Yoast SEO is that your sitemap is automatically updated whenever you add new pages or blog posts to your website. You don’t have to worry about manually updating it!
What’s Next?
Now that you’ve created and submitted your XML sitemap, you’ve taken an important step toward improving your website’s SEO. Here are a few more tips:
- Create Quality Content: The better your content, the higher your chances of ranking in search results.
- Promote Your Site: Share your posts on social media to drive traffic.
- Monitor Your Website’s Performance: Use Google Analytics and Search Console to keep track of how your site is performing.
Conclusion
Creating an XML sitemap in WordPress is a simple and effective way to help search engines crawl your site. By following the steps above, you’ve made sure that search engines like Google and Bing can find all the important pages on your website.
If you ever make changes to your site, like adding new pages or blog posts, don’t worry—Yoast SEO will automatically update your sitemap for you. All you need to do is keep creating great content, and let the search engines do their work!
Frequently Asked Questions (FAQs)
1. Do I need to create a sitemap if I have a small website?
Even if your website is small, having a sitemap is a good practice. It helps search engines understand your site better and ensures all your pages are indexed.
2. Can I create a sitemap without Yoast SEO?
Yes! There are other plugins like Google XML Sitemaps that can also generate sitemaps. However, Yoast SEO is one of the easiest and most popular options.
3. How often should I submit my sitemap to Google?
You don’t need to resubmit your sitemap every time you update your site. Once it’s submitted, Google will check it regularly for updates. However, if you make major changes to your site, you can resubmit it.
Now you have everything you need to create and manage your XML sitemap in WordPress. Good luck, and happy optimizing! Keep checking to Techie SEO for more information.
